 BioLite TV
 Gear
Gear Recipes
 Adventures
How to Use BioLite Lanterns to Improve Your Campsite Photography
We recently posted our 1,080th photo on Instagram and decided to look back on the evolution of our photography and what resonates most with our community. Here's what we found: you all like flames - and you love starry nights. And why wouldn't you? There's something entrancing about the vastness of a starry sky and an illuminated tent underneath it. Turns out that it’s not too hard to photograph light at night. It comes down to having the right gear and the time to practice. With a little help from our ambassadors, we’re going to show you how to use BioLite lanterns to capture that shot along with two other nighttime favorites. (We're all about using iPhone cameras but for the purpose of this blog our tips will focus on how to use a DSLR or similar camera to create epic nighttime images).
How to Capture An Illuminated Tent With A Visible Milky Way Backdrop

Bruce Wilson is the founder of Three Peak Films. As a professional videographer and photographer focused on outdoor lifestyle and climbing, he’s been capturing shots like these for years. Here’s his advice for recreating an image like the one above: “There are a few factors that go into making a night scene actually work and for the most part this comes with a lot of trial and error,” says Bruce. “But eventually you'll get a system down that works for you. Here is what I think is an ideal scenario:"
1. Plan your camping trip during a new moon. A new moon basically means you don’t have a moon in the sky and no moonlight to compete with. This makes it easier to see the milky way and stars around you. The best time of year to capture the milky way is actually coming up. The milky way is much more visible in the Northern Hemisphere during summer than in the winter.
2. Find the right backdrop. Set up your tent on level ground in an area where there is a lot of open sky. Ideal backdrops include a mountain range on the horizon or a tree line in the distance. Try to avoid heavily wooded areas as they tend to limit the amount of sky visible in your frame.
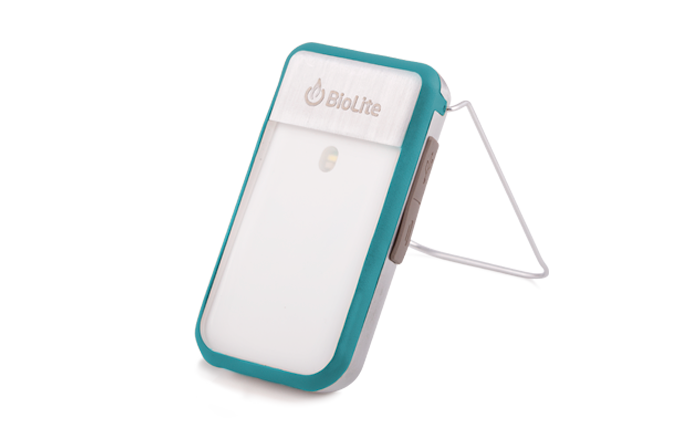
3. Light up your tent. Use the PowerLight Mini dimmed down and filtered with a gallon of water so it’s softer and more even throughout the tent. You don't want the tent to be too bright because when you are editing and try to pull out the highlights in the milky way, the tent will look blown out.
4. Start Experimenting. Once I have my scene set and lit up, I fire off a few test shots to see how it all fits into the composition of my shot. Position your tripod so that you can fit everything in the frame, and set your exposure for about 30 seconds. A long exposure is key to capturing this shot as it allows you to soak up as much starlight as possible. Once you are ready to start shooting make sure that your model(s) hold still and no pets run through to disturb the shot. Check your shot and keep experimenting with exposure, timing, and poses to get the exact shot you’re looking for. It takes a lot practice, but once you get it your gram game will be on point.
How To Master The Light Burst

Our ambassador Christin Healey has of perfected the light burst shot, especially when it comes to shooting the PowerLight Mini. After speaking with her about how to replicate images like her Instagram above, she recommends setting your DSLR camera to as high of an aperture as possible. When you use a high aperture, you leave a narrow opening inside your camera lens for light to pass through, this helps create a diffraction of light and causes the starburst shape. Christin's technique below will allow you to achieve a starburst without having to touchup in photoshop.
1. Prepare Your Scene. We find that our most successful starbust Instagrams include at least one model holding a light near a tent or a beautiful overlook. We recommending setting your model up with a bright light in their hand and, “if you are shooting this at twilight, dusk, or nighttime, you will need to also put your camera on a tripod to compensate for the time it will take to capture as less light is coming through the lens."
2. Set The F-Stop. “I usually shoot on f/20 or f/22 to get that really pronounced burst,” says Christin. “You could go a little lower, but keep it at f/16 or above for best results. Shutter speed will vary based on how much light is available. You can take a few shots with different f-stops and iso until you get the effect you’re looking for.”
3. Start Snapping Shots. Ask your model to stand still, especially at night as it will take more time to capture the light with a slow shutter speed. Don’t touch your camera/tripod set up while it is capturing the shot and begin practicing. Adjust your aperture settings until you find the right setting for your light.
How To Write With Light

Got a friend who couldn’t make it on the trip? Send them a message with light. The PowerLight Mini makes a perfect light pen to write a message or outline friends like the picture Christin took above. When asked about how to get writing to show up in a photo Christin says, “writing with light is an easy trick, but does take a bit of practice. All you need is a tripod, a light source, and possibly a shutter release if you are going longer than 30 seconds.”
1. Make A Game Plan. Figure out what your light source is. We recommend using a small, bright torch (like the PowerLight Mini or PowerLight). Next, set the scene. Get your model(s) in place and figure out what you plan to write. Set up your tripod and camera to ensure that everything is in the frame (you’ll want to have a tripod in this instance because the camera will be shooting for a while depending on the length of your message).
2. Take A Few Test Shots. Set your camera timer (or use a remote shutter release if you are writing the message yourself) and have your model write out a test message. "I find that it usually takes a few times to get the timing and lighting right," says Christin.
3. Write & Capture Your Message. Once you’ve got the timing down and the choreography ready, start shooting. "I try to keep it at around 30 seconds of having the aperture open, then write whatever you want with your light source!"
4. Check & Adjust. After each picture you take, look at your result and adjust the model’s movement, light, and timer from there.
Shop the BioLite lighting seen in the photographs

Feel ready to give these tips a try? Share you images with us on Instagram @biolite.